Installation
Handling & Storage
Every profiled sheet and flashing is carefully inspected before dispatch and orders are packed in edge-wrapped strapped bundles. It must be emphasised that these sheets and flashings are quality products and should be handled accordingly. On arrival at the site, care should be taken in offloading the sheets - avoid unnecessary handling of the sheets, lifting (not dragging) them directly off the bundles. If hoisting bundles and sheets into position, protect the edges and ensure that pressure across the sheets and flashings does not cause distortion.
The following precautions are essential to ensure that sheets do not deteriorate when stored on building or Agricultural sites
- Do not leave uncovered stacks lying in the open. Store under cover and away from open doorways.
- If stacks cannot be kept under cover, erect a simple frame around them, cover with a waterproof sheet, tarpaulin or polythene, but leave space between cover and sheet for air to circulate. Store stacks off the ground and on a slope, so that should rain penetrate the covering, the water will drain away.
- Do not store sheets where people will walk across them.
Failure to observe simple, but essential precautions when storing and handling colour-coated roofing and cladding sheets on site will lead to corroding and damage. The most common cause is exposing stacked sheets to the weather for weeks, even months - often lying in grass. Investigation has shown that in almost every case damage is due to negligence prior to use.
Fitting & Fixing
The fitting and fixing of profiled roofing sheets is fairly straightforward and can be undertaken by any reasonably competent person. If governed by legislation, before commencing the task please ensure that all H & S, manual handling and risk assessment procedures have been adhered to but basic common sense should always apply.
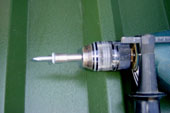
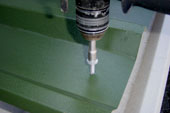
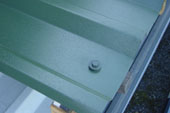
Box profile sheets are always fixed with a tech fasteners in the * valley (trough) part of the sheet directly into the purlin underneath. These screws are purpose made fittings for these sheets and are drilled in with an 8mm socket driver fitted in the chuck of your electric drill. A standard 8mm (5/16) ¼ drive socket fitted in the chuck of your electric drill will also do the job.
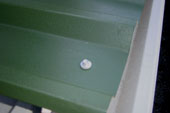
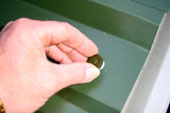
The advantages of fitting in the valley is the fitting applies a high torque when tightened correctly, without distorting the sheet, the rubber seal bonded to the galvanized washer achieves a watertight fit and because the crowns (profiles) are left clear, you achieve a better aesthetic look. They come with the relevant colour cap which fits over the fastener head to complete the job.
We carry a comprehensive stock of fasteners for fixing to timber purlins, Galvanised steel purlins and even hot rolled sections such as angle iron, box channels and RSJ’s If you are unsure on the correct type of fasteners you will need we will be pleased to offer our advice and guidance.
Start by laying the sheets at the opposite end of the roof away from the prevailing wind, so the overlap is facing downwind.
Sheets should be laid one tier at a time with the first sheet fixed loosely through the valley (trough), this allows you freedom to check that the side edge of the sheet is aligned with the side of the roof as there is only limited play for adjustment as the work proceeds. When satisfied that the sheet is correctly aligned on the roof, fit the remainder of screws (for sequence see diagram) across the first sheet into the purlins. The procedure is then continued for the remainder of tiers.
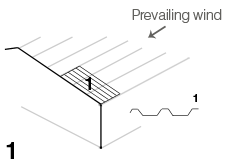
Always erect first panel at end of roof or wall. Ensure sheet is plumb and straight and then securely fasten to purlin or rail.
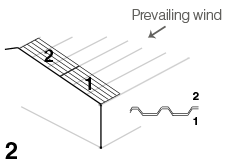
Erect second sheet allowing for minimum required end lap. Ensure sheet two aligns with sheet one then fasten sheet to purlin or rail.
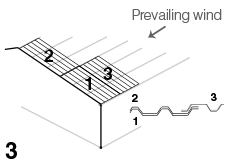
Erect third sheet with sidelap rib placed over sheet one and fix sidelap. Fasten sheet three to purlin or rail.
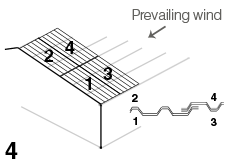
Erect fourth sheet with sidelap rib placed over sheet three and fix sidelap. Fasten sheet four to purlin or rail and continue in a similar manner to end of building.


